Showing posts with label Kate Lorenzini. Show all posts

Thursday, September 7, 2017

Masculine Holiday

Happy September THD fans!  You know how the holidays arrive earlier and earlier every year (or at least that's how it seems, especially as you age...), well for once I have made a seasonal card long before the holidays even hit the shelves!  I was inspired by our current challenge that began yesterday!  Masculine cards are hard, but Tonya has a great selection of papers, dies, and ephemera to pull together a great man's card!


Once I started cutting the Flora & Fauna Bus & Camper Dies, I couldn't stop.  I have 4 cards already completed and 6 more in the works featuring these die cuts, which are amazing and so versatile-- you can see my fall version at the challenge page!  Check back at my blog or Instagram for the others inspired by our challenge and products in the Heart Desires store!


The Concord & 9th tree ring will never get old-- stamped in Unicorn White and heat embossed on kraft, then fussy cut and layered with the rest of the die cuts and ephemera.  The fun wood saw is available in the store from Richard Garay's Lumberjack series.

The Jen Hadfield paper pack Warm & Cozy supplied all the plaids and woodgrain patterned papers.  Don't you love the Splendid Stag from Newton's Nook cut in the brown plaid?


Tonya has a great selection of Brushos, another technique I love used here on Ranger watercolor paper and die cut.


I featured the Carta Bella Autumn series Washi tape (the same design can be found in the paper pack) and wrapped it all up with the Neat & Tangled envelope die.  Tonya has a great selection of Neat and Tangled, but this die is only available as an exclusive at their site.


That's a wrap!  Hope I've helped inspire you to get a head start on holiday cards! 

Thursday, July 6, 2017

Summer Vibes

In the Pacific Northwest, Seattle specifically, they say that summer officially starts after the Fourth of July.  This year, we had an unseasonably warm June, but I've been feeling the summer vibes ever since my Memorial Day trip to our local outdoor pool (well, maybe I've been feeling them since February when I started planning my trip to California!).

At any rate, summer is in full swing for those of us in the Northern Hemisphere and I have been living easier than is typical for me with some additional time off and a lighter teaching schedule.  So I created a card that channeled a retro summer vibe and our current challenge graphic.


If you are familiar with my work, you know I like mixing up materials and brands, and for The Heart Desires, I always challenge myself to see just how many products I can use from the store!

Today's card features a stamp set I love, Whale Tail by Carta Bella, but one I don't see used much in cardmaking land-- but I should-- and you should get it now while it's 20% off!  I featured it here in my mini-journal, exactly a year ago!


Carta Bella Whale of a Tail


There are a lot of nautical sets on the market, but this one is different, a bit quirky like a lot of the Carta Bella stamps, and the quality is great.  The nautical vibe doesn't seem to be leaving the design world any time soon, so I suggest you add this one to your collection!

I paired it with the new Layering Whale set from Hero Arts (called 'Blue Whale', but it's really a humpback they designed...note the fins).  Love this set, love the layering, love that it's a humpback, as we just had a humpback visit the Sound last month!  The wave pattern stamp I feature here is perfect-- like it REALLY represents how the Puget Sound looks when the wind is gently skimming the surface.  I live on the beach and watch the changing water out my studio window throughout the day.  It's such a treat for this water baby!

Tonya has a great collection of Gina Marie Designs dies-- another less commonly seen brand out there-- but they are affordable and unique, and you can create the fern spray I made here with the Aloha set.
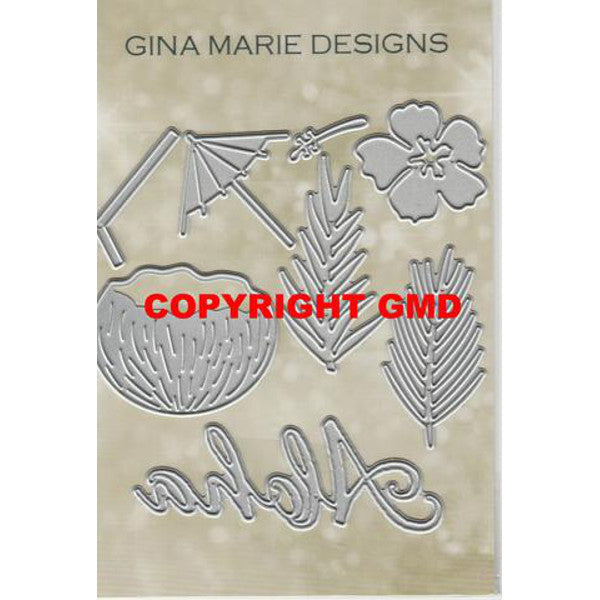

ALOHA TROPICAL DRINK DIE SET - GINA MARIE DESIGNS

But this card didn't end up working out as easy-breezy as it looks.  Wouldn't that just be the way when everything seems to be going along so smoothly?

So where did this card go very wrong, you ask?  First it was the misplaced cross-stitched circle die in the size I needed (it was eventually found on the floor under my desk), and then it was a very poor design decision when I tried (and big-time failed) to appropriately place my sentiment (it's hiding under the yellow circle sticker).  After all the layering, and perfect stamping of the lighthouse, the die cutting and permanent placement of all the pieces-- the sentiment situation made the card a total fail. Too much summer heat!

I took a step back, let it get cold (as a professor once told me to do with my writing-- such sage advice) and then decided to rummage through stickers and ephemera to find something that might actually cover up the mishap and salvage the card.  Maggie Holmes to the rescue-- a Chasing Dreams sticker and Oasis collection sentiment on the tag.  I still don't love the ensemble as much as my original plan, but I do like the repetition of circles and I wasn't about to let the materials and time spent go to waste.


I re-visioned my original sentiment and created the inner greeting using Concord and 9th's Sophisticated Script Letters. Luckily it works with the font on the tag as well!


The inside bottom is finished with some translucent paper tape in yellow-green, echoing the yellow on the front.

Tonya has a lot of new goodies in the store, so if you're looking to make some summery cards with a nautical or tropical vibe, look no further.  Play along at the challenge this month and grab some goods for 20% off.  I can't wait to see what you create!

Happy summer!


Thursday, June 1, 2017

Underwater Treasures

Hooray, it's June!  I don't know about you, but the last few months have been light on good luck in my corner of the world, and I am so ready for summer! This past weekend in the PNW gave us a taste of the season and I relished every sunshiny moment in, on and around the water.  You may know I live on the beach, steps away from the Puget Sound, and so much of my inspiration comes from the surrounding environment.

I gravitate to blues and greens in my decor for their calming and healing qualities, and lately quite a bit in my cardmaking.  I always love the combo of orange and turquoise, which features prominently in this month's card.


I layered multiple green and blue pigment inks with repeat stamping using the Hero Arts Wave stamp; Tonya has the Hero Arts Wave stencil, and you can create the same ombre effect even better with the stencil using the Hero Arts ombre mint-green ink!


I know the Memory Box Underwater Collage and Seaweed Collage are going to be a huge hit! I cut the Underwater Collage out of an embossed piece of cardstock, and then centered the Seaweed Collage and cut the window. 

It has been layered with acetate cut from the underwater collage and fun foam to create the shaker.

I used some Peacock Feathers Sequins  and glitter glass, as well as some beachy sequins, which are also on the sequin strand.  Mica also makes for an awesome shaker component, especially for underwater scenes.


Tonya has a great selection of new Waffle Flower word dies--their sentiment dies have such awesome fonts, and all of them would work perfectly in the window, but I have used the Good Luck one here, not yet available in the store.  It has been cut from customized alcohol-inked glossy paper.  


I just had to include two additional photos with my harbor seals (dies from Memory Box as well) cut from patterned paper.  Tonya currently has the equally adorable Neighborly Narwhal that would be perfect with this scene. Harbor seals are a common sight here in Seattle and around the Puget Sound, and I usually find one or two while kayaking, which is such a treat. Though they are at their carrying capacity in the Puget Sound, they certainly do need all the luck they can get in the first few months and years of their life as pups and weaners. They have a 50% survival rate in the first year and being that much of the area where they haul out are urban or busy human-populated beaches, they face many more challenges on land from human activity and interference. Pupping season varies with latitude, but typically occurs early spring through the summer in Atlantic and Pacific coastal areas. We are entering pupping season on the outer West Coast now, and soon along inland shores in the Puget Sound.  You can learn more here and here if  you are interested in helping protect these beautiful creatures, especially important if you live in a coastal area! 

I will be working with MaST as part of the stranding team and through educational outreach--and my first event is this weekend teaching students about our marine mammals, the upcoming pupping season, what to do if they see one stranded or hauled out, and how to be the best stewards of their environment!  So excited!  And paper-crafting will be involved!  They will get to make their own seal die cut necklaces and stamp or color them!  Since it's the first outreach event I've done, I guess I will need some good luck as well! 


May you find calm waters, sunny stretches, and lucky, crafty days ahead! Thanks for stopping by today! And make sure to play along with us next week in our anniversary challenge #13 which goes live on Wednesday 6/7!

Thursday, May 4, 2017

How We Roll!

Welcome to May, THD fans!  Let's hope it is full of flowers and fewer showers! I am so ready for the rain to end here in the PNW!

And I am so sorry to have missed you at my appointed time in April--it was indeed a cruel, cruel month, so I am welcoming May with open arms, kind of the like the sweet new cat stamp, Flora, from Waffle Flower featured in my cards below!

I made these cards with my students in mind. For most youth, the desire to fit in and not appear different is pretty typical. But working with young people diagnosed with learning disabilities (LD), the feeling of being different and all the emotions that go along with it are turned up to 11! So the kids need lots of positive reinforcement, which is why making cards is so fun.

I often use card making as a reward for some of my kids who meet learning or behavior goals as many enjoy playing with ink and paper and creating cards for their parents or friends.  It can also be a good way for kids with fine motor difficulties to work on their motor control by manipulating stamps, scissors, and aligning images, or coloring in lines.  I am not an occupational therapist, but do need to incorporate fine motor exercises for some of my kids, and what better way to do it than making art?! Learning is hard work, but it should also have some element of fun-- so that's how we roll in my studio!


For my first card, I have incorporated three new offerings from Waffle Flower, all available in the store-- Layering Marble, Magical Butterfly and Flora Cat Play!  While I didn't use it here, you can get the same circle window effect by using Waffle Flower's Inverted Circle die.


I love the marbling stamp, though it does take some practice, and having the guide (available at Waffle Flower's website) does help with aligning stamps if you are particular, but really, you can mix and match to create your own unique marbling effect.  I have achieved that here with layers of pink ink and Delicata Gold, which was heat embossed for extra sheen.


The magical butterfly die is so sweet, and I love that you can inlay the wings or make them dimensional.  I decided to layer them so I could get a 3-D effect. 


I kept my cat black and white as to not compete with the busy card front, which was cut using the Gina Marie Cross Stitch die-- I love these dies as they are inexpensive and she has some really fun offerings.


I'm obsessed right now with lacy backgrounds and wrappings, as well as creating my own envelopes. So I wrapped up this sweet card with some gorgeous two-sided 12 x 12 paper cut from a new Neat and Tangled die.  I really like how it looks with the butterfly and the intricate design of the cat.


Next up, You Do You!


While I was at it, I made a second card, which features Flora, whom I have foiled here-- a new technique for me.  I fussy cut her and placed within the Gina Marie Circle Cross Stitched die.


The back has been stamped with a bold Kaisercraft subway style sentiment.  I love these stamps, and Tonya has a few from them in the shop!


And that's a wrap!


Hope you've found some inspiration here today, and don't forget to check out our latest challenge which started yesterday!

Keep on rolling!

Thursday, March 2, 2017

All you need is love and...


_______________________.  How would you finish that sentence today?  In keeping with our March challenge theme and my recent horoscope, my answer would be 'love and vacation'!  It really is time for another get-away--I've been pining for Portland and Astoria, but maybe this time of year, given our wacky March weather, tropical would be better!

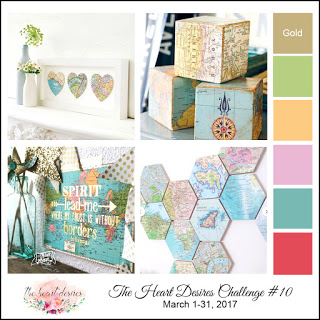
Since you've made the trip here today, I'll take you someplace nautical!  I used the challenge graphic as inspiration, with the maps and hexagons, but the colors are more primary.  Hope you'll be inspired to mix and match some sets from the store, all linked within the text, and play along with us this month!


I cut the majority of my hexagons from the wonderfully heavy, textured Carta Bella Yacht Club paper and took forever to arrange them!  The hexagon coverplate was deconstructed and elevated.


The foam glitter heart is cut from Concord and 9th's Layering Leaves die set.


The sentiment on the front of the card is from Neat and Tangled's Perfect Blend set-- that corner just needed something next to the chain, but I didn't want to clutter it up, so a small sentiment worked perfectly.  The font also was ideal for the interior sentiment, which is from Kaisercraft's Say Aloha set.


Note the polka dot washi-- echoing the gold polka dots in the challenge pic!


Here's a view of the dimensional nature of the card!

Here's our challenge graphic:

 March Challenge

And apologies if you stopped by my blog to see yesterday's (3/1) post for our challenge roll-out, and the text was not there!  The post has been updated entirely--my brain took a trip on the migraine train this week-- definitely not the vacation I had in mind (pun intended!)!!

Thanks for spending some time with me today at The Heart Desires!! Happy Spring!

Other Supplies Used:MFT Hexagon Coverplate
Memory Box Chain die
Savvy Stamps Anchor die

Thursday, February 2, 2017

Birthday Layer Cake


Happy February, THD fans!  There's a lot to celebrate today-- a new month, a new challenge here at THD, Groundhog's Day, and... my birthday!  I'm so glad to be sharing it with you, and to sweeten the ocassion, I have a new take on the old Concord and 9th tree ring-- chocolate layer cake!


I stamped the tree rings with Hero Arts Unicorn White ink on Tim Holtz watercolor paper and heat embossed with white powder. Using Brushos, I sprinkled, dappled and painted the rings with the crystals.

I then fussy cut two of the rings and layered them atop the largest ring.


The white embossing is like rings of icing!


I really like these brushos for the variation in colors--the brown Brushos have pink crystals and multiple browns.

Using Altenew's Wild Hibiscus, I adorned my cake with these gorgeous neon pink flowers and the butterfly, which I stamped on vellum, heat embossed, and then fussy cut.  This floral set is going to get so much use--the sketched flowers and butterfly variations are amazing and they will work really well with some of the new Waffleflower selections that Tonya will soon offer in the store. It's also a Mother's Day focued set, a holiday that will be here before we know it! 


My centerpiece has been layered atop Neat and Tangled's Hexstar coverplate. Working with the law of thirds, and the last of my beloved Jen Hadfield gilded woodgrain paper, I layered a bit under the coverplate and echoed it with the little sprig-- which is very similar to the Gina Marie leaves Tonya has in store.


I hope you were inspired to use your Concord and 9th Tree Ring in a new way!  Think of the wedding, anniversary, and birthday cake combos you can make with this great stamp, some delicious Brushos, and a variety of adornments!  I think I'll make a 5 vanilla and chocolate layer cake next!

Have a sweet February, and here's to 6 fewer weeks of winter (keep your shadow down Groundhog!).


Other Items Used:
Papertrey Ink Birthday Sentiment Die
WOW Neon Embossing Powder

Thursday, January 5, 2017

Wintery Thanks!

Happy New Year, THD fans!  We have an inspiring first week of January over here and I hope you have seen our wintery challenge for this month!

Today I have a holiday thank you fitting for the season and featuring Brushos!  Have you tried these yet?  I finally had a chance to break into mine and experiment over the holiday break-- they are so much fun and fairly easy to manipulate.


First I shook some Emerald green Brushos onto dry Tim Holtz watercolor paper, being fairly deliberate about where I applied the crystals, as I wanted more of a splattered and multi-colored look with white space, rather than a blended watercolor look which is easily achieved with these.

That is what is great about Brushos-- you can really manipulate the crystals, so more effects are achieved than what you get when just using watercolors or Distress inks.

They remind me of Pop Rocks-- without the fizzing.  I don't, however, recommend eating them!

After applying crystals, I spritzed them using a Mini-Mister, from about 6 inches directly above for a fine mist, then close up for larger water droplets.  The distance had an effect on the response of the crystals.  I tried not to use too much water so I would get a more mottled effect.

I blended in some placeswith a wet brush, and for the very dark green, I picked up some crystals on a wet brush and applied here and there.

After about 30 minutes of drying time, I cut my branches.  Note that if some of the crystals don't disolve, you can just gently brush them off with a dry brush.  But be careful as they will stain everything if you have any moisture-- on brush or finger!


I adhered my branches to a Gold Delicata inked, heat embossed, and fussy cut vellum Concord and 9th Tree Ring (you all know by now just how much I love this stamp!!).

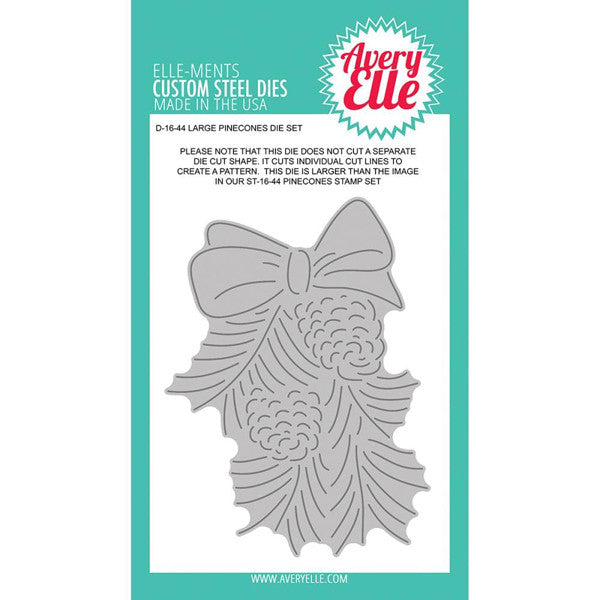
While I have used some other products here for my branches, flower, and embossed background, there are some great alternatives in the store that would look amazing.  The Avery Elle Pinecone Die would work beautifully with this card design atop the tree ring, as would the Altenew Poinsettia Stamp and Die set!

The sentiment is from Concord and 9th's Brushed Blossoms.

Tonya's currently out of the Avery Elle Dotted Border Die, but you could use the Avery Elle Snow Caps dies to cut a similar curved border-- and this set is so versatile and fun!


Alternate Product Options available in store for CASEing my card:
Love My Tapes Gold Stripe Foil Washi Tape
Love My Tapes Gold Stripe washi

Richard Garay Knit Pattern Embossing Folder
Richard Garay Knit Embossing Folder
Altenew Poinsettia & PineAvery Elle Pinecone Die - The Heart DesiresAvery Elle Snow Caps Die


That's it for me today! Hope you were inspired to start your new year with some new techniques and products!  Thanks for joining me today!

Thursday, October 6, 2016

My Kind of Naughty

Happy Thursday!  Happy October!

While some people might say Christmas is the most wonderful time of the year, I happen to think October has it beat.

Nothing compares to the eye-popping, at times nearly psychedelic, golds and greens and reds that illuminate the darkening afternoons, that sparkle in the autumn sun, that simultaneously turn our eyes upward and tune our ears downward to the delightful crackle beneath our feet.  To say nothing of the the autumn moon rising round, the air's altered energy, the thinning veil, and if you pay attention, maybe, just maybe a spirit or two whispering by you.  

Plus, if you are just a slightly naughty spirit trading in more tricks than treats, no man in a red suit is going to be judging you.

And what would October be without cats?  Was there ever a season more fitting for these moon-eyed creatures that creep around, hunting, haunting, all stealth, like blithe spirits?  I think cats are the only animal whose naughtiness actually makes them more endearing.  But you know, I am a biased, crazy cat lady, who may just be La Dame Blanche with her spirit animals ever in tow... :)

So, Miss Utinni and her antics were the inspiration for this card.  I was so excited to see that Tonya stocked the new Avery Elle Dear Santa and Concord & 9th's Layering Leaves.  Nearly all product used here is available in the store, and all has been directly linked so you can shop now!!! 

And you will see that I have turned these products on their head a bit!


Concord & 9th's Tree Ring is my golden, harvest moon, stamped with Delicata Golden Glitz ink and heat embossed on vellum, then fussy cut.

The Layering Leaves wheat spear is my broom.

And look at Miss Utinni in her mask and cape!  The real baby girl is indeed my kind of naughty!  

Miss Utinni, AKA Baby Girl, 7 mos.

She has been stamped in grey pigment ink and heat embossed, then Copic colored.  

Next, I stamped the image again with Hero Arts Black Pigment ink and heat embossed with black powder to get a more pronounced outline.

Finally, I covered the bow with Versamark clear embossing ink, sticky embossing powder, heat set and covered with a fine layer of black glitter.  You can see a faint outline of the bow below the glitter, which was my intent.  The bow was fussy cut and adhered to the main image.


The same effect of the glitter bow and cape can be achieved with the Bo Bunny Licorice Glitter Paste that Tonya carries.

Licorice Glitter Paste
I love Neat and Tangled's Hexstar cover die for the background-- seems fitting for the season, no? Watch out, or she'll put a hex on you!


I chose the blue triangle paper from Bloom to represent the sky-- and the triangles are like little witch hats!

The cape is pretty special-- you can get a similar effect by deconstructing the Hexstar die; I used another woven die cut for my purposes here, fussy cutting it to get the shape of a flowing cape and manipulating it after heat embossing with black glitter, so it looks like it is waving in the wind!


Wondering about that sentiment?  I took part of it from Concord & 9th's set Crazy Awesome and the 'naughty' is from the Dear Santa set.

I embossed the Neat and Tangled Hexstar cover die, then stamped my sentiment, heat embossed and fussy cut to fit atop the main die.  You can see more of the detailing of the embossing below.


I've lined the inside with some bat washi and a Happy Halloween sentiment.

I hope you were inspired to look at your product in a new light and give it a new life!

Happy haunting you crafty ones!