Showing posts with label Tim Holtz. Show all posts

Thursday, May 18, 2017

Sending You Hugs


I think I've mentioned this before, but my great grandma's name was Bunny. So every time I play with the My Favorite Things Somebunny Stamps set I think of her. She was so sweet and loving. Always loved giving hugs. I'm sure I'll be sending this to my grandma for a little thank you. This stamp set really has great sentiments for thank you and birthday cards which is what I tend to need the most of. 


I also used this We r Memory Keepers Next Level Embossing Folder - Bouquet.  If you don't have this set yet you need to order it now because it is a beautiful must have. It is beautiful just by itself for a gorgeous super fast last minute thank you card.      


Thank you so much stopping by! 
XOXO 
SugarGem

Thursday, April 20, 2017

Wishing You A Pawsome Day

Hi everyone! Today I'm playing with the super cute Lawn Fawn Meow You Doin Stamp Set! I love this set because I can use the sentiments for kitty stamps  and doggy stamps.


I also used 
Lawn Fawn Happy Die 

XOXO 
SugarGem 


Thursday, March 16, 2017

You're a Hoot

Hi everyone it's Lenae here from SugarGem. I wanted to make a little card for my grandma so I used this super cute Lawn Fawn set called Mom + Me. My grandma is probably one of best friends. I love her so much and always have fun with her. She's also really funny so this sentiment is perfect for her.


Thank you for stopping by! 
XOXO 
SugarGem  


Thursday, January 5, 2017

Wintery Thanks!

Happy New Year, THD fans!  We have an inspiring first week of January over here and I hope you have seen our wintery challenge for this month!

Today I have a holiday thank you fitting for the season and featuring Brushos!  Have you tried these yet?  I finally had a chance to break into mine and experiment over the holiday break-- they are so much fun and fairly easy to manipulate.


First I shook some Emerald green Brushos onto dry Tim Holtz watercolor paper, being fairly deliberate about where I applied the crystals, as I wanted more of a splattered and multi-colored look with white space, rather than a blended watercolor look which is easily achieved with these.

That is what is great about Brushos-- you can really manipulate the crystals, so more effects are achieved than what you get when just using watercolors or Distress inks.

They remind me of Pop Rocks-- without the fizzing.  I don't, however, recommend eating them!

After applying crystals, I spritzed them using a Mini-Mister, from about 6 inches directly above for a fine mist, then close up for larger water droplets.  The distance had an effect on the response of the crystals.  I tried not to use too much water so I would get a more mottled effect.

I blended in some placeswith a wet brush, and for the very dark green, I picked up some crystals on a wet brush and applied here and there.

After about 30 minutes of drying time, I cut my branches.  Note that if some of the crystals don't disolve, you can just gently brush them off with a dry brush.  But be careful as they will stain everything if you have any moisture-- on brush or finger!


I adhered my branches to a Gold Delicata inked, heat embossed, and fussy cut vellum Concord and 9th Tree Ring (you all know by now just how much I love this stamp!!).

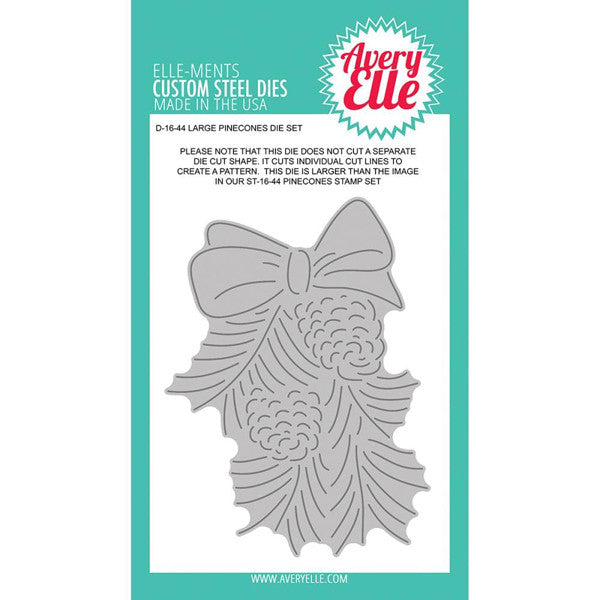
While I have used some other products here for my branches, flower, and embossed background, there are some great alternatives in the store that would look amazing.  The Avery Elle Pinecone Die would work beautifully with this card design atop the tree ring, as would the Altenew Poinsettia Stamp and Die set!

The sentiment is from Concord and 9th's Brushed Blossoms.

Tonya's currently out of the Avery Elle Dotted Border Die, but you could use the Avery Elle Snow Caps dies to cut a similar curved border-- and this set is so versatile and fun!


Alternate Product Options available in store for CASEing my card:
Love My Tapes Gold Stripe Foil Washi Tape
Love My Tapes Gold Stripe washi

Richard Garay Knit Pattern Embossing Folder
Richard Garay Knit Embossing Folder
Altenew Poinsettia & PineAvery Elle Pinecone Die - The Heart DesiresAvery Elle Snow Caps Die


That's it for me today! Hope you were inspired to start your new year with some new techniques and products!  Thanks for joining me today!

Friday, December 9, 2016

Jingle all the way to the WCLBH!
We are so happy to be a super sponsor for the Winter Coffee Blog Hop!


There are all kinds of awesome prizes to be won!  You have a full week to join in the festivities.

Here is one of the cards I created:
    Distress Inks Tumbled Glass, Chipped Sapphire, Black Soot, Blending Tool; Versafine Black; VeraMark; 
White embossing powder; Copics and you can't see it but Wink of Stella on the ice.


It's time to grab a cup of your favorite warm beverage, mine is a peppermint white mocha and start hopping!  Be sure to stop back by here during the week to see what the design team creates!

Wishing you happy hopping and a very merry Christmas season!

Tonya

*I completely for got to tell you we are running a sale during the hop!  10% off your order by using code 2016WCLBH  www.theheartdesires.com*


Monday, November 21, 2016

Sailors Delight

Have you heard the saying, "Pink at night, sailors delight.  Pink in the morning, sailors take warning." I wonder if there is truth to it.  So curious in fact that looked this up.... but  it was so complicated I didn't want to bore you with the details. :)  But if you are curious, check it out here. 

Anyway, that saying and the beautiful PNW are what inspired today's card.  


This card features the Concord and 9th Written in the Stars as the main focal point of the island.  I stamped off the cloud so it would be sort of see through.  I used Distress Inks to create the background, specifically I put down some post it notes to create a crisp horizon line and used Broken China and Blueprint Sketch across the bottom, I then added Squeezed Lemonade and Picked Raspberry on the top, the overlap of them created the orange.  I colored the Ferry Boat from Memory Box using my Copics.  To create the internal lighting, I simply put a post it behind it and cut it to shape.   The scalloped oval frame popped out added a nice opportunity to add some waves around the bottom and in the frame.  These were also colored via distress inks and I added some funky Spackle stuff on the waves so it looked like foam. 

Recently, after creating this card, my family took a ferry ride across the water.  The sun was out and it was lovely. 

I hope you enjoyed this post and will join us for this month's challenge!  You are also welcome to come and visit me over at my blog. :)


Friday, July 29, 2016

I Spy . . .

How exciting!  Two of our DT members (including me--tee hee!) were recently spotlighted in the fab CAS Mix Up card challenge.  If you're unfamiliar with that one, it's a challenge for CAS mixed media cards with a very cool definition of mixed media.  Go check it out.

Also, check out Kimberly's fantastic Pick of the Month card (amazing, right?!) and my Outstanding Design card below.  We both used Concord & 9th and watercolor products along with other goodies available from The Heart Desires store.